Loading...

2009-04-29

Firefox 3.5Beta 4 Release for OpenSolaris Now Available

The latest beta version of Firefox 3.5 is now available as a preview release.
It is able to download from here.
Getting a tarball for opensolaris-i386, extracted it and installed on My Notebook computer.

いよいよ、Firefox 3.5b4 (en) for OpenSolaris バージョンがリリースされた。
さっそく、ここから tarball-i386(en) をダウンロードして、マイノート PC にインストールしてみた。
既に Firefox 3.1b3 がインストールされているので、このバージョンと共存させるために tarball を選択した。 Opensolaris では依存関係があって、既存の Firefox を単独に削除するのは難しそうだ。
この点 Ubuntu あたりはは容易く、削除、アップデート・インストールができるのに。
1. Download tarball for opensolaris x86
$ cd ~/src-pkg
$ wget http://releases.mozilla.org/pub/mozilla.org/firefox/releases/3.5b4/contrib/solaris_tarball/firefox-3.5b4.en-US.opensolaris-i386.tar.bz2
$ cd /usr/lib
$ pfexec su
# mv firefox firefox3.1b3 ; 上書きされないように firefox3.1b3 にリネームしておく。

 firefox3.1b3 起動コマンドのシンボリックリンクを作成する。
# rm -f /usr/bin/firefox                    ; 既存分をいったん削除
# ln -s /usr/lib/firefox3.1b3/firefox /usr/bin/firefox3   ; 起動コマンド変更

ダウンロードした tarball を /usr/lib/ 以下にコピーする。
# cp -p /export/home/hoge/src-pkg/firefox-3.5b4.en-US.opensolaris-i386.tar.bz2 .
2. Extract tarball :
# bzip2 -dc firefox-3.5b4.en-US.opensolaris-i386.tar.bz2 | tar -xf -
/usr/lib/firefox フォルダが作成されて展開・インストールされる。
3, 次に、firefox plugin を編集する。
  # cd plugins
# cp -p /usr/lib/firefox3.1b3/plugins/gtk*.so .
# ln -s ../../../java/jre/plugin/i386/ns7/libjavaplugin_oji.so
# cp -p /usr/lib/firefox3.1b3/plugins/lib*.so .
# cp -p /usr/lib/firefox3.1b3/plugins/nppdf.so .
# ln -s /opt/Realplayer11/mozilla/nphelix.so .
# ls
gtk-vnc-plugin.so libnullplugin.so nppdf.so
libflashplayer.so libtotem-basic-plugin.so
libjavaplugin_oji.so nphelix.so
4. firefox 3.5b4 起動コマンドのシンボリックリンクを作成する。
# ln -s /usr/lib/firefox/firefox /usr/bin/firefox   ; firefox 3.5b4 起動コマンド作成
# exit
$ cd ~/

従来の Firefox 3.1b3 の起動は、
  $ firefox3
Firefox 3.5b4 の起動は、
  $ firefox -ProfileManager
新しい profile を作成して、起動。 : new profile name : "default_user"

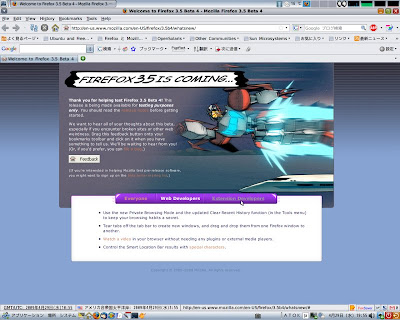
Image: Firefox 3.5b4 初期起動画面
5. 日本語パックのインストール
 ここから、Firefox 3.5b4 対応の日本語パック( ja.xpi)をインストールしておく。
従来版で使っていたアドオンのいくつかは Firefox 3.5 に未対応のものが多々ある。
greasemonky, Locale Switcher など。 いずれ拡充することだろう。
しばらくの間は、二つのバージョンを切り換えながら様子を見てまいりましょう。
----------------------------------------------------------------------------
試用環境: $ uname -a
SunOS xxxxxx 5.11 snv_111a i86pc i386 i86pc Solaris
Platforn: Dell Latitude D410 Pentium M1.6GHz, RAM 2048MB (533MHz), 40GB/160GB
----------------------------------------------------------------------------

2009-04-24

Ubuntu 9.04, "Jaunty Jackalope", was released

On 23rd April 2009, Ubuntu 9.04 was released. "Jaunty Jackalope" is the code name for Ubuntu 9.04. Ubuntu 9.04 Desktop Edition is free to download from Thursday 23 April.
Also announced were the simultaneous releases of Ubuntu 9.04 Server Edition and Ubuntu 9.04 Netbook Remix (UNR). --- readmore and available to download these iso9660 image files here.

Ubuntu 9.04, コード名 "Jaunty Jackalope" 正式版がリリースされた。 Kubuntu, Xbuntu もしかり。  
My Notebook PC には既に RC 版をインストール済みで、ここ数日来煩雑にアップデートされていたので、本機も正式版と同等になっているのではなかろうかと、勝手に推察。
とりあえず、Desktop Edition の iso image をダウンロードした。Ubuntu 上で ユーティリティ を起動して Live USB を作成しておく。
Ubuntu Japanese Team には このアナウンスはまだない。 日本語版 Remix もそのうちに・・・


2009-04-16

Clean Install with LiveUSB, OpenSolaris preview 2009.06, based on build snv_111

 GENUNIX から osol-0906-x86-111.usb をダウンロードして、usbcopy スクリプトを使って LiveUSB (IOdata 1GB miniSD + USB-Reader-Writer-adaptor) を作成した。(前稿参照
 この LiveUSB を用いて、My Notebook PC, Dell Latitude D410 にクリーンインストールを試みた。
 インストール済みの Opensolaris pre. 2009.06, build snv_109 を # pkg image-update してもよいのだが、
 snv_110 で遭遇した、トラブル(バグ?)を回避できるか?・・・期待を込めて、敢えてクリーン・インストールしてみる。
 Windoz XP, OpenSolaris pre.2009.06, Ubuntu 9.04 beta から成る、トリプル・ブートシステムだ。
 OpenSolaris をインストールすると、Grub Boot Menu (menu.lst) が書き換えられてしまうので、
 インストール後に menu.lst を編集して、Ubuntu の起動メニューを追記することにする。


 環境: Dell Latitude D410, Intel Pentium-M1.6GHz, RAM 2048MB (533Mhz)
         Graphics Video Chipset: intel 915GM (128MB Shared memory).
         Windoz XP NTFS : /dev/sda1, /dev/sda2, Total 60GB (Primary)
         Solaris Partition : /dev/sda3 40GB (Primary)
         Linux Partition : /dev/sda4 60GB (Extended, Logical)
         Ubuntu (Ext3) : /dev/sda5, /dev/sda6, /dev/sda7(swap), /dev/sda8


 USB Pen Drive を USBポートに装着してPC電源投入。 POST の後、"F12" キー押下、
 起動メニューを表示。 USB ドライブを選択して LiveUSB を起動させる。
 操作は LiveCD と同様。スタートアップメニューのトップライン(先頭行)を選択してブート完了。
 途中で、Language と KeyBoard Layout の問いかけがある。 Japanese を選択。
 以後、すんなりとオートログインして、GNOME Desktop 画面が立ち上がった。


  Image-01 LiveUSB(CD)スタートアップ後の GNOME Desktop 画面
 
 DDU(Device Driver Utility) を起動して、My Notebook デバイスの認識状況をチェックする。
 例によって、Modem Driver と Smart Card Driver は認識されない。

Image-02 DDU(Device Driver Utility) 検出結果表示画面

 Firefox は 3.1 beta3 になっている。 snv_111 ではチャンと動きますかな?
 さて、クリーン・インストールしてみよう。 デスクトップのインストールアイコンをクリックしてインストール開始。
 Solaris Partition は 40GB を割り当てた。 約 20 分でインストールが完了した。 即、システムを再起動。
 インストール直後の初動 GRUB メニュー画面は、 osol-0906-snv_111(Graphic console) と Windows のみ表示される。
 後で Grub menu.lst を編集して、ubuntu 9.04 beta 起動メニューの追加と opensolaris と windoz 起動メニューの体裁を整えることにする。

 特に問題なくシステムが立ち上がり、GDM ログイン画面が表示される。
 予め設定しておいた ユーザ名とパスワードを入力して、 GNOME Desktop にログインする。
 
Image-03 OpenSolaris build snv_111 GDM ログイン画面

Desktop のデフォルトの背景は 2008.11 と比べてちょっとクールかも。
  
Image-04 OpenSolaris snv_111 初動 GNOME Desktop 画面

 インストール後のシステムの設定とアプリケーション・開発ツールの導入については後述。


2009-04-15

Makeup LiveUSB with OpenSolaris preview 2009.06, build snv_111

Tue Apr 07 2009 OpenSolaris preview 2009.06, based on build 111, is available!
Several iso images and usb images are able to download from GENUNIX site.
1. Download osol-0906-111-x86.usb
  $ mkdir ~/DVD_CD-Image
  $ mkdir ~/DVD_CD-Image/osol-0906-b111
  $ cd ~/DVD_CD-Image/osol-0906-b111
  $ wget http://www.genunix.org/distributions/indiana/osol-0906-111-x86.usb
  $ wget http://www.genunix.org/distributions/indiana/md5sums_111.txt
  $ ls
  md5sums_111.txt osol-0906-111-x86.usb
2. Checksum the downloaded file.
 $ md5sum osol-0906-111-x86.usb
  d6548ae861d23f1f4e984b56b2911892 osol-0906-111-x86.usb  : checksum okey!
3. Copy osol-0906-111-x86.usb file to my pkging drectory.
 $ cp -p osol-0906-111-x86.usb ~/src-pkg/
4. Download distro_constructor.
  $ cd src-pkg
 $ hg clone ssh://anon@hg.opensolaris.org/hg/caiman/distro_constructor
 The authenticity of host 'hg.opensolaris.org (72.5.123.5)' can't be established.
 RSA key fingerprint is 63:b9:7a:f3:dc:a4:47:a7:a5:50:ef:05:78:39:8d:ad.
 Are you sure you want to continue connecting (yes/no)? yes
 remote: Warning: Permanently added 'hg.opensolaris.org,72.5.123.5' (RSA) to the list of known hosts.
 destination directory: distro_constructor
 requesting all changes
 adding changesets
 adding manifests
 adding file changes
 added 107 changesets with 575 changes to 415 files
 updating working directory
 45 files updated, 0 files merged, 0 files removed, 0 files unresolved
5. Comfirm the downloaded distro_constructor
 $ ls
 distro_constructor osol-0906-111-x86.usb
 $ cd distro_constructor
 $ ls
 README new packages src test_data tools usr
 $ cd tools
 $ ls
 listusb proc_slist.pl proc_tracedata usbcopy usbgen
 $ ls ../../
 distro_constructor osol-0906-111-x86.usb
6. Insert a USB Pen Dive ( > 1GB) to one of USB ports.
  $ export LANG=C
7. Makeup LiveUSB image file to the USB Pen Drive.
  Execute usbcopy script.
  $ pfexec ./usbcopy ../../osol-0906-111-x86.usb
  Found the following USB devices:
  0: /dev/rdsk/c7t0d0p0 SAMSUNG CDRW/DVD SN-324S U306
  1: /dev/rdsk/c9t0d0p0 952.5 MB USB Storage Device
  Enter the number of your choice: 1

  WARNING: All data on your USB storage will be lost.
  Are you sure you want to install to
  USB Storage Device, 952 MB at /dev/rdsk/c9t0d0p0 ? (y/n) y
  Copying and verifying image to USB device
  Finished 786 MB in 420 seconds (1.8MB/s)
  0 block(s) re-written due to verification failure
  Installing grub to USB device /dev/rdsk/c9t0d0s0
  Completed copy to USB

 $ cd ~
 $ pfexec reboot
8. Startup from the LiveUSB, then Select the BIOS boot menu: start from USB Storage.
________________________________
* Environment: 

    Dell Latitude D410, Pentium-M1.6, 2048MB (533MHz), 40GB/160GB HDD.
    Triple Boot System: Osol-0906-b109, Windoz XP, Ubuntu 9.04 beta.
________________________________

2009-04-06

OpenSolaris preview 2009.06, based on build 110 is now available.

OpenSolaris preview 2009.06 Rlease, Build snv_110
kernel snv_109 からコマンドラインで # pkg image-update して snv_110にアップデートしたとき、
デスクトップログイン後にアプリケーションを起動すると、例外なく画面がフリーズして、数秒後に自動的にシステムダウンし、再起動してしまう。 これでは実用に耐えないので、以前の BE (snv_109) で運用中だ。

GENUNIX サイトで OpenSolaris preview 2009.06 snv_b110 が入手できる。
ここからは、すべてのビルドを閲覧し、ダウンロードできる。
ISO Universal x86 / osol-0906-110-x86.iso をダウンロードして、My NoteBook PC に クリーン
インストールしてみる。 Live CD を起動して、インストール作業は問題なく完了した。

環境: Dell Latitude D410, Intel Pentium-M1.6GHz, RAM 2048MB (533Mhz)
Windoz XP NTFS : /dev/sda1, /dev/sda2, Total 60GB (Primary)
Solaris Partition : /dev/sda3 40GB (Primary)
Linux Partition : /dev/sda4 60GB (Extended, Logical)
Ubuntu (Ext3) : /dev/sda5, /dev/sda6, /dev/sda7, /dev/sda8

$ uname -a
SunOS xxxxxx 5.11 snv_110 i86pc i386 i86pc Solaris

$ more /etc/release
OpenSolaris 2009.06 snv_110 X86
Copyright 2009 Sun Microsystems, Inc. All Rights Reserved.
Use is subject to license terms.
Assembled 19 March 2009

Repository (http://pkg.opensolaris.org/dev) を追加して、これを有効(preferred) にする。
$ pfexec pkg set-authority -P -O http://pkg.opensolaris.org:80/dev/ osol.develop
$ pfexec pkg authority
PUBLISHER   TYPE   STATUS   URI
osol.develop (preferred) origin online http://pkg.opensolaris.org:80/dev/
opensolaris.org origin online http://pkg.opensolaris.org:80/release/

インストール完了後にシステムを再起動して、GDM ログインは問題なくできた。
しかし、GNOME Desktop 上で Panel メニューやアイコンをマウスでクリックする度に、フリーズしてしまい、 数秒後にシステムが勝手にシャットダウン、再起動してしまう。 snv_b110 は MyNoteBook D410 では実用に耐えない。 回避策はあるのかな?

Linux Foundation Takes Reins of Moblin Project from Intel

The Linux Foundation, the organization dedicated to accelerating the growth of Linux,
announces it will host the Moblin project, an open Linux-based mobile project started by Intel.
News source :  http://www.eweek.com/c/a/Linux-and-Open-Source/The-Linux-Foundation-Takes-the-Reins-of-the-Moblin-Project-from-Intel-249944/?kc=rss
Intel がモバイル向け Linux "Moblin" を Linux 普及推進団体の The Linux Foundation に移管したそうだ。
記事: http://itpro.nikkeibp.co.jp/article/NEWS/20090403/327785/

2009-04-01

OpenSolaris Kernel Updates to snv_111

2009-April-01: Justinさんのブログより 
OpenSolarisのカーネルがsnv_111 にアップデートされたようだ。
これで、snv_110 で生じていたいくつかのトラブルが解消されるといいな。
My NoteBook PC では、snv_110 にアップデートして、GNOME デスクトップにログインは出来たのだが、
アプリを起動したとたんに、画面がフリーズして、勝手にシャットダウン・再起動・・・
全く用を成さないので、当面 snv_b109 のまま運用中。
様子を見て アップデートしてみようか。

AdobeReader 9.1 Japanese for Solaris x86

ftp.adobe.com サイトをのぞいていたら、AdobeReader 9.1 日本語版 for Solaris x86 が リリースされていた。早速ゲットして、My NoteBook PC にインストールした。
______________________________________
Solaris x86 版 必要システム構成: 
  * 32bitのインテルPentiumクラスのプロセッサ
  * Solaris 10 u5またはOpenSolaris 2008.11
  * GNOMEまたはKDEデスクトップ環境(Solaris 10にはGNOMEのみ)
  * 512MB以上のRAM(1GB以上を推奨)
  * 200MB以上の空き容量のあるハードディスク(サポートされるすべてのフォントパックをインストールするには75MB以上の追加の空き容量が必要)
  * GTK+(GIMP Toolkit)ユーザインターフェイスライブラリ バージョン2.6以降(Solaris 10ではGTK 2.4.9でも可)
  * Firefox2.0以降
  * OpenLDAP、およびCUPSライブラリ
環境: SunOS xxxxxx 5.11 snv_109 i86pc i386 i86pc Solaris
Platform: Dell Latitude D410, Pentium M1.6GHz, RAM 2048 MB(533MHz), 40GB (/dev/sd3)
______________________________________
1.バイナリインストーラをダウンロード 
  $ cd ~/src-pkg
  $ wget ftp://ftp.adobe.com/pub/adobe/reader/unix/9.x/9.1/jpn/AdbeRdr9.1.0-1_i486solaris_jpn.bin
2.実行権限を与える
  $ chmod +x AdbeRdr9.1.0-1_i486solaris_jpn.bin
  $ ls -l AdbeRdr9.1.0-1_i486solaris_jpn.bin
  -rwxr-xr-x 1 baian baian 56565332 2009-04-21 16:11

3.インストール実行
  $ pfexec ./AdbeRdr9.1.0-1_i486solaris_jpn.bin
default で /opt/Adobe/Reader9 以下にインストールされる。
アプリケーションメニュー → オフィス に AdobeReader 9 メニューと 、デスクトップにも起動アイコン AdobeReader 9 が自動生成された。
4.システム再起動、再ログイン とりあえず。
5. Firefox 用 plugin の確認と Plugin を Firefox へコピーする 
  $ ls /opt/Adobe/Reader9/Browser/intellinux
  nppdf.so
  $ cp /opt/Adobe/Reader9/Browser/intellinux/nppdf.so /usr/lib/firefox/plugins/
6.AdobeReader 9.1 を起動する
GUI で: アプリケーションメニュー またはデスクトップの起動アイコン(AdobeReader 9) をクリック。 あるいは、CUI で: $ acroread &  ( /usr/bin/acroread ) コマンドを与える。

Image-01: AdobeReader 9.1 起動画面