Loading...

2008-06-30

Start up Howto : Live CD / OpenSolaris 2008.05 release on My Legacy Notebook computer

June 30,2008 ことしも早、下半期に突入だ. 

  Windows XP と Ubuntu 8.10 (Hardy Heron) LTS (Desktop) をインストールした My dynabook Satellite 1800 に opensolaris 2008.05 release を追加インストールして、triple boot system に仕立てあげてみた.

  すでに いくつか投稿済みなのだが(恥を忍んで posted in my poor english )、今後のメンテナンスのこともあるので、日本語でまとめておこうと思い立ち.

 これはそのシステム環境整備・インストール・セットアップについての個人的な覚え書き(唯我独尊・無保証)である.


1. ハードウェア仕様概要 (Hardware Specification Outline)

  ※ 構成モジュール換装済み(自己責任で換装・調整・無保証)  
Model name: Toshiba dynabook Satellite 1800 SA70C/4 改(構成モジュールをいくつか換装した)
Basic Model No : PS18070C4418 (日本国内モデル:2001年5月発売)
* CPU: Intel Celeron (coppermine) 1.0 GHz (FSB 100MHz で動作):換装

   ※ Intel Pentium Ⅲ (coppermine) 800 MHz でも動作確認済.
* Trident Microsystems Cyber-blade AI/1 video chip, 8MB Video-RAM

* 1024 x 768 TOS52 LCD screen,14.1(TFT/XGA)
* 512 MB RAM installed ( PC133 256bit SDRAM SODIMM 256MB x2 ) : 換装
* Optical Drive: super multi DVD-RAM drive, model MATSHITA UJ-850-S (OEM Model):換装
* Ali Corporation M5451 PCI AC-Link controller audio device
* Network Adapter : on board, Intel 82558-integrated Fast Ethernet Adapter
* PC-Card Slot : TYPE II×2 slot or TYPE III×1 slot (PC Card Standard,Cardbus 32bit)
* USB 1.1 port (legacy) :x2 ports
* Legacy I/O interfaces : 1x Serial COM1, 1x Parallel port
* 3.5inch Floppy Drive (2-modes) x1/div>
* 赤外線ポート(IRDA) x1

* 拡張インターフェース(PCカード):USB2.0/1.1 x1 (Carbus 32Bit) Ratoc System Inc.
2.ハードディスクドライブのパーティション作成 : System Rescue CD (ここからダウンロード)を使用した.
  Windows XP と xubuntu 8.04 のデュアルブートシステムに opensolaris 2008.05 release を追加インストールするために、パーティションツール Gpart で既存の領域を縮小・再配置して約 10GB の Solaris 領域を確保した.
これで "トリプルブート・システム” となるはずだ.
ハードディスクの容量不足は否めないが、懐中寒々しいのでしょうがないのだ・・・
2-1.事前準備:
   opensolaris 2008.05 の導入に際して、ハードウェア・デバイスドライバのサポート情報を収集する。
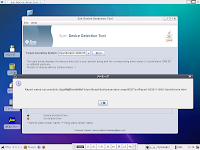
ここからSUN Device Detection Tool 2.01 (file: sddtool_21.jnlp) をダウンロード.即起動して、導入予定のハードウェアで Solaris OS の導入可否についてチェックする.xubuntu 8.04 上で実行した. Java 実行環境が必要である.
  結果は、オーディオデバイスとACPI がサポートされていない。とりあえず、opensolaris 2008.05 release の導入・試用評価であるのでよしとする。
ちなみに、この SDDTool は 起動メニュー (dialogue:context menu) で 他の Solaris / Developer 1/08, Solaris 10 5/08 を選択することもできる.下図参照 --> Image-01、Image-02 (クリックで拡大)

Image-01 : SDDTool 起動画面

Image-02 : SDDTool チェック結果画面

また、SDDTool でチェックした結果を *.html ファイルとして、所定のフォルダに保存することができる.
下図参照 --> Image-03、Image-04 、Image-05 (クリックで拡大)

Image-03 : SDDTool チェック結果保存 (*.html) 画面

Image-04 : SDDTool チェック結果保存完了 (*.html) 画面

Image-05 : SDDTool チェック結果保存ファイル (*.html)

 なお、opensolaris 2008.05 release をインストールした後に、Audio device Driver と Cardbus Device Driver を Google Search して、これらの導入を試みることにする.


3.opensolaris 2008.05 release Live CD の起動:

3-1.ブートメニューから Terminal-mode を選択してスタートアップ.


マシンの電源スイッチをON.CD/DVDドライブにLive CDをセットして F2 キーを押して

起動ドライブ選択メニューを表示させて、光学ドライブを選択しCDを読み込ませる.

GRUB メニューから、” Text Console option" を選択して "Enter" ・・・ブート・・・


※ 注意事項:

Trident video driver は kernel driver: vesatext は使わず、xorg-trident driver(No DDC) を使うことにする.その理由については、すでに述べたとおりだ.

 マシンに搭載されている Trident Video Chip が VESA(DDC)をサポートしていないことに起因する.

グラフィカルモードを選択してスタートアップさせると、ブート途中で (X) Windowに切り替わるときに、それまでの LCD 表示画面がブラックアウトしてしまい、グラフィカル・ログインが不正となってしまう.

 したがって、次のような手順(ステップ・バイ・ステップ)で システムを起動させる.この手順を経ずに、LIVE CD デフォルトのグラフィカル・モードを選択してもシステムを起動させることはできない.

 Trident video chip 以外の いくつかの Video Chip を搭載したマシンでも同様に opensolaris 2008.05 release の LIVE CDスタートアップ〜インストールすることができないという報告も多々あるようだ.


3-2.テキスト・コンソール ログイン画面が表示される.


  user name : "jack"   password : " jack" と入力してログインする.


3-3.あらかじめ編集し、USBフラッシュメモリ(フロッピーディスクでも可)に格納しておいた " xorg.conf " ファイルを システムに読み込ませて、/etc/X11/xorg.conf としてコピーする.


USBフラッシュメモリ)を マシン背面の USB ポートの一つに挿入する.

ペンドライブが認識されていることを確認する.次のコマンドを入力する.


jack@opensolaris:~$ ls /media/pendrive


xorg.conf ファイルがあることを確認する.


jack@opensolaris:~$ ls /media/pendrive/xorg.conf

jack@opensolaris:~$ /media/pendrive/xorg.conf


次にこの xorg.conf ファイルをシステムの /etc/X11 ディレクトリ以下にコピーする.


jack@opensolaris:~$ pfexec cp /media/pendrive/xorg.conf /etc/X11/xorg.conf

jack@opensolaris:~$ cat /etc/X11/xorg.conf
* 編集した /etc/X11/xorg.conf ファイルは 以下のとおりだ.

-------------------------------------------------
# /etc/X11/xorg.conf scripts

# Custom file modified by Baian-Inc.,Labo. in June/04/2008.
Section  "InputDevice"
Identifier  "Generic Keyboard"

Driver "kbd"
Option "XkbRules" "xorg"
Option "XkbModel" "jp106"
Option "XkbLayout" "jp"
EndSection
Section "InputDevice"
Identifier "Configured Mouse"

Driver "mouse"
Option "CorePointer"
Option "Device" "/dev/input/mice"

Option "Protoxol" "ImPS/2"
EndSectionSection "Device"
Identifier "Trident Microsystems CyberBlade/i1"

Driver "trident"
BusID "PCI:1:0:0"
Option "NoDDC" :ここがミソ
EndSection

Section "Monitor"
Identifier "ToshLCD"
Option "DPMS"
HorizSync 30-71
VertRefresh 50-100

EndSection
Section "Screen"
Identifier "Default Screen
Monitor "ToshLCD"

Device "Trident Microsystems CyberBlade/i1"
DefaultDepth 16
SubSection "Display"
Depth 16

Modes "1024x768"
EndSubSection

SubSection "Display"
Depth 24

Modes "1024x768"
EndSubSection

SubSection "Display"
Depth 16
Modes "800x600"
EndSubSection

SubSection "Display"
Depth 24

Modes "800x600"
EndSubSection
EndSection
Section "ServerLayout"
Identifier "Default Layout"

Screen "Default Screen"
InputDevice "Configured Mouse"

EndSection
--------------------------------------------
3−4.以下のコマンドを入力して GNOME Display Manager (gdm) を起動させる。


jack@opensolaris:~$ svcadm enable gdm


GNOME デスクトップ画面が表示される。


Image-06 ライセンス契約


Image-07 Live CD Start up 完了 初期 Gnome Desktop 画面

次は、インストール・・・

続きは --->> Install Howto : OpenSolaris 2008.05 release on My Legacy Notebook computer で・・・

二年後 100M級携帯 LTE が世界を覆う・・・そうだ

二年後に始まる 100M級携帯 LTE が世界を覆う・・・そうだ
 ※ 記事抜粋引用:詳細参照
 100Mビット/秒超のデータ通信速度を実現する次世代携帯規格「LTE」(long term evolution)が2010年にも実用化される。モバイル環境でこれまでの常識を覆す,FTTHに匹敵する実効速度が実現可能になる。LTEは世界中 の多くの携帯電話事業者を巻き込み,事実上の統一規格として世界中を覆う勢いだ。2年後のLTE商用化を見据えた事業者の戦略も見えてきた。
 モバイル環境でFTTH並みの100Mビット/秒の速度が2年後にも実現する──。“モバイルFTTH”とも呼べる次世代の携帯電話システム「LTE」(long term evolution)が,早ければ2010年度中に利用できるようになる。・・・
ふ〜〜む

W05K/CDMA1 は風前の灯火か・・・
いまだに ubuntu 8.04 (Hardy heron) LTS で動かないぞ!っと

ストレージドライブの Volume_UUID 設定値 (ubuntu 8.04)

## ストレージドライブの Volume_UUID 設定値 (ubuntu 8.04)
-------------------------------------
# /dev/hd* Volume_id=UUID detect command:
→ example
# sudo /lib/udev/vol_id /dev/hda* | grep UUID
-----------------------------------------------------
/dev/hda1 : UUID=1E38CCA038CC77F3                       
/dev/hda2 : UUID=468C88558C884183
/dev/hda5 : UUID=4b106813-09da-49f0-a6a7-b8916be77f09
/dev/hda6 : UUID=3a1ac045-4b07-4fb1-a8e8-a17a76b3a549
/dev/hda7 : UUID=8976fbd9-f05a-4208-9ab7-b7f903561585
/dev/hda8 : UUID=22fd8f36-4fd7-45b3-8fda-a17e4c25d0d9
/dev/hda9 : UUID=bea764da-8ebe-4d55-bcf0-607e08d3fc2e


2008-06-05

Install howto : opensolaris 2008.05 release on my dynabook

# Installation succeeded then after the system reboots.
1. From the GRUB menu, select the top line. 
Then edit (press the key button "E") the kernel line end to add "-m milestone=single-user", then press enter.
2. Next, press the key "B" button then system is booted with single-user.
3. # login with "single-user"
4. # ls /etc/X11/xorg.conf ---> # confirm the script :
    # vi xorg.conf 
5. Then command scripts :
    # svcadm milestone all ---> startx ---->>
6. Now, the GDM is started and the Login menu is displayed.
7. With the Dialog Box colomn, input the username and the password.
8. Press "Enter" key, then Log on to the GNOME Desktop.
9. After displaying the gnome splash screen, GNOME Desktop window is displayed.
10. Confirm the network connection with the command prompt on the gnome terminal.
     $ su -
     $ passwd ?
user@hogehost:~# svcs svc:/network/physical
     STATE    STIME     FMRI
     disabled 9:28:35   svc:/network/physical:default
     online   9:28:43   svc:/network/physical:nwam
     * command to disable the network (offline : nwam)
     # svcadm disable svc:/network/physical:nwam
     # svcadm enable svc:/network/physical:default
user@hogehost:~# svcs svc:/network/physical
     STATE   STIME      FMRI
    disabled 12:22:14   svc:/network/physical:nwam
    online   12:22:36   svc:/network/physical:default
user@hogehost:~#
* command to enable the network (online : nwam)
# svcadm disable svc:/network/physical:default
# svcadm enable svc:/network/physical:nwam
Then Brought the network interface iprb0 up, got address aaa.bbb.ccc.ddd.
# ifconfig -a
# ping aaa:bbb:ccc:ddd ----> aaa.bbb.ccc.ddd is alive.

2008-06-04

OpenSolaris 2008.05 Live CD startup howto on My dynabook Satellite 1800 notebook computer


Get the opensolaris 2005.05 release


The following document describes how to startup and to install the Live CD on my Toshiba Satellite 1800 notebook computer.

The primary issue installing opensolaris 2008.05 release on this machine is absence of support for DDC video monitor detection, which will cause a problem with running the Live CD and the default installation procedure will lock up the system.
So the instructions below are a bit more complicated than a standard starting up and installation, which usually involves just a handful of prompts and mouse clicks.

# workaround :
Use the xorg trident driver to install the opensolaris 2008.05 release onto my system.
# preparation :
The workaround for the DDC bug is that you need to install an xorg.conf configuration file without DDC before installing the X Window system and the GNOME Desktop.
The following file is my "/etc/X11/xorg.conf" file.
The key point is to add the line in the "Device" that says Option NoDDC"
---------------------------------------
# xorg.conf (X.Org X Window System server configuration file)
* /etc/X11/xorg.conf file as following scrips :
--------------------------------------
# xorg.conf (X.Org X Window System server configuration file)
# Custom file modified by Baian-Inc.,Labo. in June/04/2008.
Section "InputDevice"
Identifier "Generic Keyboard"
Driver "kbd"
Option "XkbRules" "xorg"
Option "XkbModel" "jp106"
Option "XkbLayout" "jp"
EndSection
"InputDevice"
Identifier "Configured Mouse"
Driver "mouse"
Option "CorePointer"
Option "Device" "/dev/input/mice"
Option "Protoxol" "ImPS/2"
Section "Device"
Identifier "Trident Microsystems CyberBlade/i1"
Driver "trident" BusID "PCI:1:0:0"
Option "NoDDC"
EndSection
Section "Monitor"
Identifier "ToshLCD"
Option "DPMS"
HorizSync 30-71
VertRefresh 50-100
EndSection
Section "Screen"
Identifier "Default Screen"
Monitor "ToshLCD"
Device "Trident Microsystems CyberBlade/i1"
Default Depth 16
SubSection "Display"
Depth 16
Modes "1024x768"
EndSubSection
SubSection "Display
Depth 24
Modes "1024x768"
EndSubSection
SubSection "Display"
Depth 16
Modes "800x600"
EndSubSection
SubSection "Display"
Depth 24
Modes "800x600"
EndSection
Section "ServerLayout"
"Default Layout"
Screen "Default Screen"
InputDevice "Configured Mouse"
EndSection
----------------------------------
※ Store the above edited "xorg.conf" file into the pendrive (USB Flash Memory).
# How to startup the Live CD, opensolaris 2008.05 release.
1. Power on the machine and boot with the
Live CD in the optical drive.
2. From the GRUB menu, select the Text Console option.
3. Login with user name: "jack", and the password: "jack".
4. Insert the pendrive (USB Flash menory) to one of the USB Ports.
5. The pendrive is detected automaticaly as /media/pendrive(Dirve Label name).
Execute the following command to comfirm to detect the device (/media/pendrive
jack@opensolaris:~$ ls /media/pendrive/xorg.conf
jack@opensolaris:~$ /media/pendrive/xorg.conf
6. Execute the following command.

jack@opensolaris:~$ pfexec cp xorg.conf /etc/X11/xorg.conf

jack@opensolaris:~$ svcadm enable gdm
7. Then starting X-window, while several minutes, the GNOME Desktop is displayed.


Image-01 Live CD Startup Desktop 画面


8.Now the opensolaris 2008.05 release as the Live CD is succeeded to start up on my machine.

# Next Step is to install the opensolaris 2008.05 release into the solaris
partition on the hard drive.


About how to install the opensolaris 2008.05 release.

To be continued

2008-06-02

About My Toshiba Satellite 1800 notebook computer

The followings document describes how I set up an Ubuntu 8.04 (Hardy Heron) LTS system on my Toshiba Satellite 1800 SA70C/4-modified notebook computer.
# About my Toshiba Satellite 1800 SA70C/4 notebook computer :
-------------------------------------------------------------
The Toshiba 1800 SA70C/4 is a mid-range laptop for Domestic model in Japan built in May-23-2001.
# About the Hardware Specification Outline of Basic Model No.PS18070C4418.
-------------------------------------------------------------
* Intel Celeron (coppermine) 700 MHz CPU
* Trident Microsystems Cyber-blade AI1 video chip,8MB Video-RAM
* 1024 x 768 TOS52 LCD screen,14.1(TFT/XGA)
* 128 MB RAM installed (max 512 MB in two PC100 SDRAM SODIMM sockets)
* 10 GB hard drive
* TEAC CD-224E CD-ROM drive
* Ali Corporation M5451 PCI AC-Link controller audio device
* Network Adapter : on board, Intel 82558-integrated Fast Ethernet Adapter
* PC-Card Slot : TYPE II×2 slot or TYPE III×1 slot (PC Card Standard,Cardbus 32bit)
* USB 1.1 port : 2 ports
* Legacy I/O interfaces : 1xSerial COM1, 1xParallel port
-------------------------------------------
1. Components upgrade
1-1. CPU Upgrades: Replaced Celeron 700 MHz to Celeron 1.0 GHz (coppermine).
1-2. Memory Upgrades: Although Linux will operate with the small memory/hard-drive configuration that this machine came with, your performance will be significantly poorer than it can be. It is highly recommended that you purchase a memory upgrade.
The memory SODIMMs slide into a pair of slots accessible through a screwed-on cover on the bottom of the machine.
I got a pair of 256MB PC133 SDRAM modules upgrade to 512MB.
1-3. Hard Drive Upgrades
While your upgrading the memory, you should also get a larger, faster hard drive.
While having more space is helpful, the speed improvement with a more modern hard drive will make a noticeable performance improvement.
The hard drive fits into a carriage on the side of the machine that is released with a single screw. I got a new 40GB Toshiba ATA drive, model MK4025GAS.
1-4. Optical Drive Upgrades: I got a new super multi DVD-RAM drive, model Matshita UJ-850-S (for OEM).
As the default interfaces connection of this optical drive is slave that was not recognised on my pc-system, so PIN47-45 of backport connecter was terminated with solder, then correctly working recognised as secondary master drive.
2. Upgrade Your BIOS
Although I'm not certain this is necessary, you should go to csd.toshiba.com, get a copy of the most recent BIOS for this machine, and flash your BIOS.
This operation must be performed from Windoze. In my case, the upgrade was from v1.90 to v2.20.
3. Dual Boot Install:
This machine came with Windoze 98 pre-installed and I later installed a legit copy of XP on the machine from CD. If you want to be able to run Windoze and Linux on the same machine, you will need to either split your existing Windoze partition or repartition your hard drive and completely reinstall Windoze on one of the new, smaller partitions. Splitting an existing NTFS partition with ntfsresize is not covered in this document. I chose the reinstall path, using the SystemRescue CD to run fdisk and split the partition before reinstalling XP Professiona SP2.
Backup Your Windoze Registration Files: Regardless of whether you chose to reinstall Windoze or split your Windoze partition, you should keep your Windoze XP registration files to avoid having to go through the MS activation procedures. Copy these two files onto a floppy or flash drive. If you have to reinstall Windoze, these files can be copied into the new installation.
c:¥WINDOWS¥system32¥wpa.dbl
c:¥WINDOWS¥system32¥wpa.bak
4. Install Command Line Ubuntu
Ubuntu is a popular and friendly variant of the Debian Linux distribution.
Normally, installation can be accomplished with a handful of mouse clicks. However, because the installer has a bug related to the video chip in this machine, you will need to install a command-line version first. Use of the regular installer will result in a freeze when you get to the point where the installer starts configuring the windowing system (X).
The procedure is a bit cumbersome, but I haven't found an easier way.
The primary issue installing Ubuntu on this machine is the absence of support for DDC video monitor detection, which will cause the default installers to lock up.
So the instructions below are a bit more complicated than a standard Ubuntu installation, which usually involves just a handful of prompts and mouse clicks.
4-1. Download and Burn the Alternate Desktop CD:
You will need to perform a command-line installation which is only available on the "Alternate Desktop CD".
You specify this CD with a checkbox on the Ubuntu download page.
The downloaded file is a CD disk image (ISO) that you should burn it to a Blank CD-R/RW using your CD burning software.
4-2. Boot the Installation CD:
Insert the installation CD in the CD drive and reboot.
If the machine ignores the CD and boots from the hard drive, you need to change your BIOS boot order by holding down the ESC key while rebooting and changing the boot order on the BIOS screen so that the CD drive is first in the order list.
4-3. Install A Command-Line System:
At the Ubuntu boot screen, you should choose the option, "Install a command-line system" and press RETURN.
You will be asked a series of questions...

.... to be continued.