Loading...
Showing posts with label laptop-pc. Show all posts

2009-08-10

Linux Mint 7 KDE community edition Released

" Clement Lefebvre has announced the release of the "KDE" edition of Linux Mint 7: "The team is proud to announce the release of Linux Mint 7 'KDE'. Based on Kubuntu 9.04, Linux 2.6.28, KDE 4.2.4 and X.Org 7.4, Linux Mint 7 'KDE' community edition features a lot of improvements and the latest software from the open source world.
" Highlights: "KDE 4.2.4 and Amarok 2.1 - the latest and shiniest KDE desktop and applications; mintInstall improvements - featured applications, pre-filled information, seamless screenshot downloads, improved GUI layout; mintUpdate improvements - changelogs, package sizes, usability; mintUpload improvements - ads-free, GUI improvements, graphical service manager, SCP/SFTP support; mintWelcome; command-line goodies - APT version, RTFM...."

See the release announcement and release notes for further information.

About Linux Mint
Linux Mint is an Ubuntu-based distribution whose goal is to provide a more complete out-of-the-box experience by including browser plugins, media codecs, support for DVD playback, Java and other components. It also adds a custom desktop and menus, several unique configuration tools, and a web-based package installation interface. Linux Mint is compatible with Ubuntu software repositories.

Linux Mint Summary 
Distribution Linux Mint
Home http://linuxmint.com/
Mailing List
--
Users Forum
http://linuxmint.com/forum/
Documents http://linuxmint.com/wiki/
Screenshots http://www.linuxmint.com/screenshots.phpThe Coding Studio
Download mirror
http://www.linuxmint.com/download.php
Bug Tracker --
Related Web Sites
LinuxMint-ArtLinux Mint FranceLinux Mint GermanyLinux Mint ItalyLinux Mint Spain


For a detailed overview of the new features and improvements included in Linux Mint 7 KDE, please read “What’s new in Gloria KDE?“.

System requirements:
A minimum of 4GB of free space and 256MB RAM are needed. For a comfortable experience we recommended to have at least 512MB RAM and 10GB of free space.

New features
This edition is based on Kubuntu 9.04 Jaunty Jackalope, Linux 2.6.28, Xorg 7.4 and it comes with the latest KDE 4.2.4 and Amarok 2.1. For a complete list of new features read: What's new in Gloria KDE?

Upstream issues
Linux Mint 7 is based on Ubuntu Jaunty Jackalope. Make sure to read the known issues related to this release.
Important links
Download Linux Mint 7 KDE:
You can download the Main Edition via torrent or via HTTP:
Size: 1.1GB LiveDVD
MD5Sum: 60d7b284446b6fdaf58cba91446ff5ff


2009-07-24

Installation of OpenSolaris 2009.06 release on My dynabook Satellite J50


Platform:
Toshiba dynabook Satellite J50 173L/5X
          CPU: Intel Pentium M740(1.73GHz) with Intel Speedstep Technology,
          Graphics Controller: Intel Mobile 915GM Express (128MB: shared memory),
          Extended memory: 2GB(1GB x 2Slots, max), DDR2-PC4200 SDRAM (533MHz),
          Hard Drive: 40GB-osol/80GB Fujitsu SATA (Internal),
          Optical Drive: Matshita UJ-850S DVD-RAM Super Multi Slim Drive (Internal),
          Floppy Drive: 3.5 inch 2 Mode (Internal),
          Ethernet Controller: Marvel 88E8053 PCI-E Gigabit Ethernet (internal),
          PCMCIA 2-slots 32bit (cardbus),
Install media: opensolaris 2009.06 Live USB stick (2GB) with USB Creator by Chyonan-san.
                osol-0906-x86.usb downloaded from GENUNIX site,
Procedure:
1. Start-up OpenSolaris 2009.06 with Live USB
   Insert Live USB stick to one of USB2.0 ports on my notebook computer.
   Power on, then push down F12 key, select to "start a USB storage drive" form the boot menu.

2. Starting from GRUB menu, select top line on it. Then the Live USB boot up successfuly.
3. login automaticaly, start up OpenSolaris 2009.06, Gnome Desktop is appeared fairly.

4. Execute DDU(Device Driver Utility).
   Marvel 88E8053 PCI-E Gigabit Ethernet driver is missing, then search this driver from the Mavel site or third party vendors.
   This dirver has been available to download from here.
   After installation to the solaris partition on my hard drive, download this binary source tar-ball from here.

5. Install OpenSolaris 2009.06 to the solaris partition on my hard drive.
   Click the icon "install here", Installation is started.
   For a while, about 30 minutes, installation has done successfully.

6. Reboot the system and eject the Live USB stick.
   Starting from GRUB menu, select top line on it.
   Then the system boot up successfuly.

7. GDM login with the configured account user and password.
   After a while, starting-up OpenSolaris 2009.06 Gnome desktop is appeared.  

8. Installation for Marvel myk ethernet driver
    Using with the another computer, pluged in a USB stick for storing some files.
8-1. Download tar-ball driver file to the stored directory on my USB stick drive.
       % cd <my downloaded file stored directory>
       % wget http://homepage2.nifty.com/mrym3/taiyodo/myk-2.6.8.tar.gz  
    
      Unmount and eject the USB stick from the another computer.

8-2. Plugin the USB stick stored the downloaded tar-ball binary myk-driver file on my dynabook satellite J50.
      % cd <my downloaded file stored directory>

8-3. Extract the downloaded tar-ball driver file. 
      % gunzip -cd myk-2.6.8.tar.gz | tar xf -

8-4. Add hostname for the NIC card into /etc/hosts file

8-5. Make links to correct binary directory and Makefile according to your configuration.
       i386 and gcc are default.

        % cd /.../myk-2.6.8
        % rm obj Makefile
        % ln -s Makefile.${KARCH}_${COMPILER} Makefile
        % ln -s ${KARCH} obj
   where ${KARCH} is the result of `isainfo -n`, and ${COMPILER} is "gcc" or "suncc" which you want to use to make the driver.
   On my dynabook J50, ${KARCH} is "i386" and ${COMPILER} is "gcc".


8-6. Making binaries only for OpenSolaris users.
      The driver likely work with GLD v3 in OpenSolaris, known as Nemo.
       You can enjoy the new functions by recompiling the source code.

        % rm Makefile.config
        % ln -s Makefile.config_gld3 Makefile.config
        % /usr/ccs/bin/make

8-7. Testing myk driver
       Testing before installation is strongly recommended.

        # cd /.../myk-2.6.8
        # /usr/ccs/bin/make install
        # ./adddrv.sh
        # /usr/ccs/bin/make uninstall  (for solaris7, don't remove the file )
        # modload obj/myk
        # devfsadm -i my0 (for solaris7, use drvconfig and reboot with -r )
        # ifconfig myk0 plumb ( where N is an instance number, typcally 0 for first card)
        # ifconfig -a        ( you will see an entry for mykN)
        # ifconfig myk0 satellite
        # ifconfig myk0      ( ensure IP address is correct)
        # ifconfig myk0 up   ( and then you can test with ping, telnet, ftp ...)

8-8. Installation myk driver
       After you ensure that the myk driver is fully functional, install it.

  (1) install the myk driver into the kernel directory
        # cd /.../myk-2.6.8
        # /usr/ccs/bin/make install

    If you do not test the myk driver yet, execute the following commands:
        # ./adddrv.sh
        # devfsadm -i myk (for solaris7, use drvconfig and reboot with -r)

  (2) Configure the network interface. Create and/or modify the following file:
        /etc/hostname.myk0

  (3) Reboot the system.
        # init 6

Reference: Free NIC drivers for Solaris
03/25/2009 myk-2.6.8 was released
---------------------------------------------------------------------------
21. myk driver for marvell PCI-E GbE controller yukon2

This was ported from FreeBSD msk driver, and an open source alternative for solaris skge driver.

Tested OS version: Solaris Expesss nv90 x86

Tested chips: marvell 88E8053, marvell 88E8058

Source file with x86/amd64 binaries: myk-2.6.8.tar.gz


NOTE: This driver doesn't support marvel yukon PCI GbE controllers.

********************************************************************
CAUTION: There is NO WARRANTY for this software.
As this software is loaded into the kernel, it might cause the kernel to
panic or hang.
                                                Masayuki Murayama
                                                KHF04453@nifty.ne.jp
********************************************************************
# Introduction
This is the Marvell yukon2 PCI express giga bit ethernt NIC driver for
Solaris.  It is distributed under the BSD license.

# Specification of the driver
File name of the driver: /kernel/drv/myk
Special file name: /dev/mykN (Where N is a unit number, typcally 0 for first card)
        For example
                % ifconfig myk0
RTL8169/8110 chipset dosn't support 1Gbpis half duplex mode.
Currently myk driver isn't stable on sparc platforms.

Tested OS version: Solaris nv 83a (Athlon 2800+ w/ SiS760GX)

Tested cards:  88E8053 -- Kurotoshiko GBE-PCIe
********************************************************************

2009-06-07

RealPlayer 11 Gold with OpenSolaris 2009.06 on My Notebook computer

RealPlayer 11 Gold for SunOS/x86 を OpenSolaris 2009.06 にインストールした。
Helix community にアクセスすると、Helix Player 11 Gold または RealPlayer 11 Gold をダウンロードすることができる。対応プラットフォームは、Linux/x86, SunOS/SPARC, /x86 である。

# RealPlayer 11 Gold for SunOS/x86:
  Minimum System Requirements
  * 500MHz Intel Pentium III processor or equivalent
  * 256MB of RAM
  * 30MB available disk space
  * 28.8Kbps modem
  * Sound card supported by SunAudio or OSS drivers
  * 65,000-color video display card set to display at 800x600 (video)
  Recommended System Requirements
  * 1.5 GHz Intel Pentium IV processor or equivalent
  * 512MB of RAM
  * 30MB available disk space
  * High speed internet connection
  * Sound card supported by OSS/SunAudio drivers
  * 16 bit color video display card set to display a resolution of 1024x768
  My Notebook computer: Dell Latitude D410
  * Intel Pentium M 1.6GHz, Intel 915GM, SODIMM 2048MB(533MHz), HDD 40GB/160GB
  * LCD resolution : 1024x768 (24 bit)
# Upgraded OpenSolaris based on snv_111a to snv_111b.
  $ uname -a
  SunOS xxxxxx 5.11 snv_111b i86pc i386 i86pc Solaris
  $ more /etc/release
               OpenSolaris 2009.06 snv_111b X86
           Copyright 2009 Sun Microsystems, Inc.  All Rights Reserved.
                        Use is subject to license terms.
                              Assembled 07 May 2009

Fig-01: Helix community - Get Helix Player

Fig-02: Player Downloads

Get RealPlayer 11 Gold/SunOS/x86 installer: here
Download the tarball "RealPlayer11Gold-x86.tar.bz2" to your saving directory.

Fig-03: Download the tarball

Extract the tarball.
$ cd /opt
$ pfexec cp [your saving directory]/RealPlayer11Gold-x86.tar.bz2 .
$ pfexec tar xvfj RealPlayer11Gold-x86.tar.bz2
$ ls -F
$ RealPlayer11Gold-x86/ RealPlayer11Gold-x86.tar.bz2
$ pfexec rm -f RealPlayer11Gold-x86.tar.bz2  
$ pfexec mv RealPlayer11Gold-x86 RealPlayer11  # if nessesary.
$ ls -F RealPlayer11
Bin/      README   common/  mozilla/  postinst/  realplay.bin*
LICENSE*  codecs/  doc/     plugins/  realplay*  share/

Make the Simbolic link the executable file "realplay*" to the directory "/usr/bin/"
$ pfexec ln -s /opt/RealPlayer11/realplay /usr/bin/realplay

Add the item "RealPayer 11" to the "Application" - "Sound and Video" menu.
Copy the file "realplay.desktop" to the directory "/usr/share/applications/".
$ pfexec cp /opt/RealPlayer11/share/realplay.desktop /usr/share/applications/realplay.desktop
Copy the icon file "realplay.png" to the directory "/usr/share/pixmaps/"
$ cp /opt/RealPlayer11/share/realplay.png /usr/share/pixmaps/realplay.png
Edit the file : /usr/share/applications/realplay.desktop
$ pfexec vi /usr/share/applications/realplay.desktop
[Desktop Entry]
Name=RealPlayer 11
Comment=Plays webcasts, music, and video
Comment[de]=Gibt Webcasts, Musik und Videos wieder
Comment[es]=Reproduce transmisiones por Internet, música y vídeo
Comment[fr]=Lecture de programmes diffusés sur le Web, musique et vidéos
Comment[it]=Riproduce webcast, musica e video
Comment[ja]=Web キャスト、ミュージック、ビデオを再生
Comment[ko]=웹캐스트, 음악 및 비디오 재생
Comment[pt_BR]=Reproduz webcasts, música e vídeo
Comment[zh_CN]=播放网络广播、音乐和视频
Comment[zh_TW]=播放網路廣播、音樂及視訊
GenericName=Media Player
Exec=realplay %U
Type=Application
Encoding=UTF-8
#Icon=realplay     # edit this line as the following.
Icon=realplay.png
Categories=GNOME;Application;AudioVideo;Audio;Video;Player
MimeType=application/x-ogg;application/ogg;audio/x-vorbis+ogg;video/x-theora+ogg;audio/mp3;audio/x-mp3;audio/mpeg;audio/mpg;audio/x-mpeg;audio/x-mpg;audio/mpegurl;audio/wav;audio/x-wav;audio/x-pn-wav;audio/x-pn-windows-acm;audio/x-pn-windows-pcm;text/vnd.rn-realtext;application/vnd.rn-realmedia-secure;application/vnd.rn-realaudio-secure;audio/x-realaudio-secure;video/vnd.rn-realvideo-secure;audio/vnd.rn-realaudio;audio/x-realaudio;application/vnd.rn-realmedia;application/vnd.rn-realmedia-vbr;image/vnd.rn-realpix;audio/x-pn-realaudio;video/vnd.rn-realvideo;application/vnd.rn-realsystem-rmj;application/vnd.rn-realsystem-rmx;audio/x-aac;audio/m4a;audio/x-m4a;audio/mp4;audio/rn-mpeg;audio/scpls;audio/x-scpls;audio/x-mpegurl;application/smil;application/x-smil;application/smil+xml;application/streamingmedia;application/x-streamingmedia;application/sdp;audio/basic;audio/x-pn-au;audio/aiff;audio/x-aiff;audio/x-pn-aiff;video/3gpp;video/3gpp-encrypted;audio/3gpp;audio/3gpp-encrypted;audio/amr;audio/amr-encrypted;audio/amr-wb;audio/amr-wb-encrypted;audio/x-rn-3gpp-amr;audio/x-rn-3gpp-amr-encrypted;audio/x-rn-3gpp-amr-wb;audio/x-rn-3gpp-amr-wb-encrypted;video/3gpp2;audio/3gpp2;video/x-real-video;video/mpeg4-generic;video/x-ms-asf;audio/x-ms-wma;video/x-ms-wmv;application/vnd.rn-wma;application/vnd.rn-wmv

Add the RealPlayer plugins to the Firefox plugins directory.
$ ls -F /opt/Realplayer11/mozilla
  nphelix.so*  nphelix.xpt*
$ pfexec ln -s /opt/Realplayer11/mozilla/nphelix.* /usr/lib/firefox-3.5b4/plugins/
$ pfexec ln -s /opt/RealPlayer11/mozilla/nehelix.* /usr/lib/firefox/plugins/

Exit from Gnome Terminal, then logout once and login again.
Comfirm the item "RealPayer 11" in the "Application" - "Sound and Video" menu.

Execute and set up RealPlayer 11 at the first time.
1. With CUI comand line (with Gnome Terminal), as the following.
   $ realplay
or
2. With GUI select the "Application" menu - "Sound and Video" - "RealPlayer 11"

Fig-04: Execute realplay and setup at the first time

Fig-05: setup RealPlayer, Release note

 
Fig-06: Finished to set-up RealPlayer and up to date.

  
Fig-07: RealPlayer 11 for Solaris is up to date.

Fig-08: RealPlayer 11, set-up preferences

2009-05-24

Linux Mint 7 Gloria may be ready for a release. may be?

Excerpt From The Linux Mint Blog, News from the Dev Team
ETA for a Mint 7 stable release?
Written by Clem on Friday, May 22nd, 2009 @ 7:21 pm +0000 | Main Topics
I can see that’s the question on everybody’s lips right now.. “when is Mint 7 going to be released?”. You probably saw on twitter that LinuxMint-7-DEV-052.iso was approved by Exploder and that it passed all the tests… and yet, no sign of it in the mirrors and no announcements on the website ... read more.

About Linux Mint
Linux Mint's purpose is to produce an elegant, up to date and comfortable GNU/Linux desktop distribution.
Excerpt From DistroWatch.com:
Linux Mint is one of the surprise packages of the past year. Originally launched as a variant of Ubuntu with integrated media codecs, it has now developed into one of the most user-friendly distributions on the market - complete with a custom desktop and menus, several unique configuration tools, a web-based package installation interface, and a number of different editions. Perhaps most importantly, this is one project where the developers and users are in constant interaction, resulting in dramatic, user-driven improvements with every new release. DistroWatch has spoken to the founder and lead developer of Linux Mint, Clement Lefebvre, about the history of the distribution.

Linux Mintは、Ubuntu から派生したディストリビューションの一つである。
2006年にフランス出身でアイルランド在住のクレマン・ルフェーブルにより設立された。Linux Mint Contributorsにて開発が行われているデスクトップ向けのディストリビューションである。パッケージのアップデート,無線LANツール,バップアッ プ・ソフトなどLinux Mint独自のツールが搭載される。64ビット版,KDE 版,Xfce 版などといった複数のエディションが用意されている。
Linux Mint は、シンプルであることよりも、多くのソフトウェアと最新の技術を使用することにより、誰にでも使いやすい Linux システムを提供することにフォーカスしている。

引用:Linux Mint - Wikipedia 
引用:人気のUbuntuから派生した多種多様なLinuxディストリビューション

参考:遂に日本語に対応した「Linux Mint 6」 - SourceForge.JP Magazine

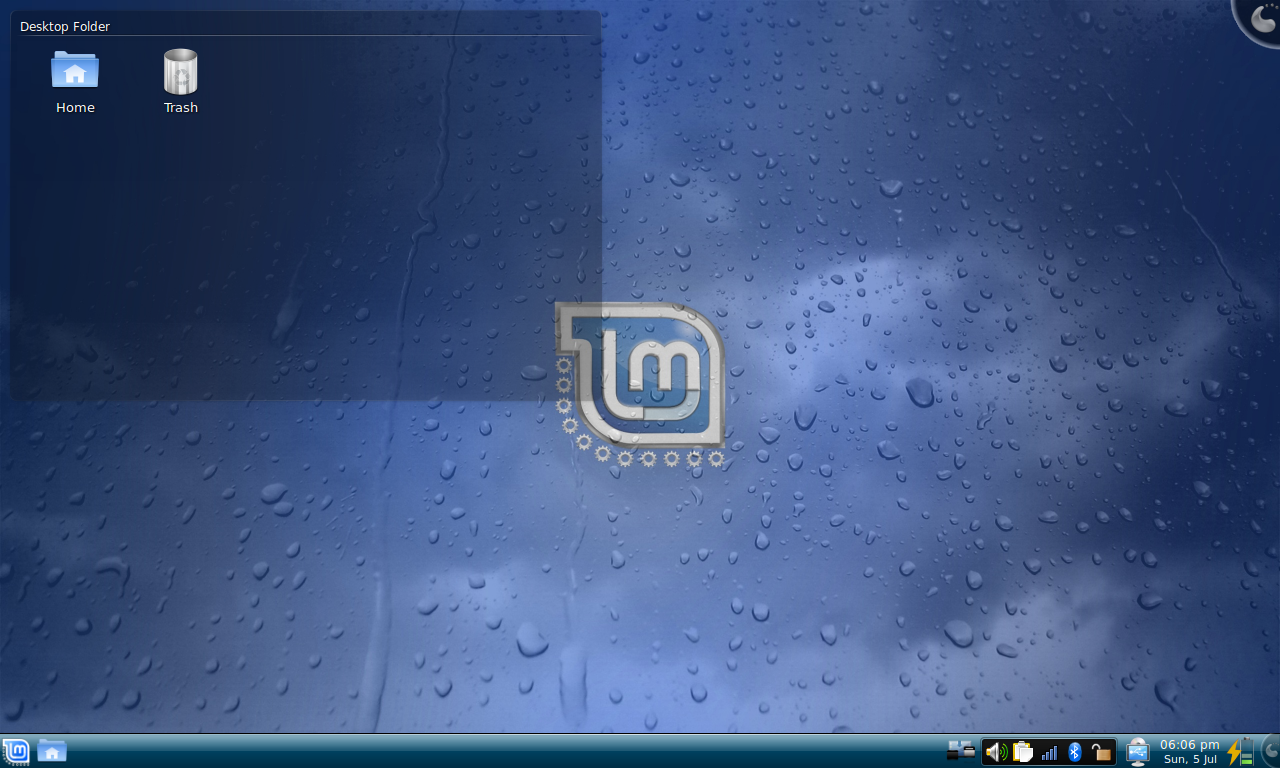
Fig-01: Snapshot Linux Mint 7, Gloria, RC1 on Toshiba Dynabook Satellite J50

Linux Mint 7 "Gloria" は Ubuntu の最新リリース版である Ubuntu 9.04 をベースに開発が行われて、Linux Mint 7 RC1 が ISOイメージでダウンロード可能である。
バグフィックス・メインテナンスの後に正式版としてリリースされるのが待ち遠しい。

追記: 2009-May-26(Tue) 20:25 JST by Baian.

2009-05-03

Installing on USBFlash Stick with Ubuntu

Desktop CD をUSBメモリにインストールする方法 : コマンドラインで
引用先: http://old.ubuntulinux.jp/wiki/InstallingOnUSBFlash/

単純にDesktop CDとして動作させるのではなく、変更内容をUSBメモリの別パーティションに保持するようにセットアップする方法である。これにより、電源を切っても作成したファイルやインストールしたアプケーションが消えなくなる。

1.必要なもの

  • 高速起動版のDesktopCDイメージCD-Rなどのメディア
  • USBメモリ
  • USBメモリからの起動に対応したPC
       ダウンロードしたCDイメージをそのまま使うなら1GBytes以上のものが必要。

2.Desktop CDのイメージをCD-Rなどに焼く。 そのCDでPCを起動する。

3.内容を消しても構わないUSBメモリをPCに差し込む。

4.自動的にマウントされた場合、アンマウントする。USBメモリのデバイスはマシンによって異なるので、dhコマンドやdmesgコマンドで調べる。

5.fdiskコマンドでパーティションを切る。1番目のパーティションを700MBytes、残りを2番目のデータ保存用パーティションに割り当てるとよい。
カスタマイズしたCDを使う場合は、1番目のパーティションのサイズをCDのサイズに合わせて作成する。
  $ sudo fdisk [USBメモリのデバイス ]

パーティションの作成例(2GBytesのUSBメモリを使った場合。
Disk /dev/sdb: 2063 MB, 2063597568 bytes
255 heads, 63 sectors/track, 250 cylinders
Units = シリンダ数 of 16065 * 512 = 8225280 bytes
デバイス Boot Start End   Blocks    Id   System
/dev/sdb1    1     86  690763+  83   Linux
/dev/sdb2    87    250 1317330   83   Linux

6. 以下のコマンドを実行する。
  # /cdrom/tools/install_usb.sh [USBメモリのデバイスファイル] [起動パーティション番号] [データパーティション番号]

USBメモリのデバイスファイルが /dev/sda、起動パーティションが 1、データ用パーティションが 2 ならば、以下のようになる。 データパーティション番号を省略すれば、作成されない。
  # /cdrom/tools/install_usb.sh /dev/sda 1 2 

あとは画面の指示に従って入力する。

7. PCを再起動し、BIOSでUSBから起動するよう設定する。

2009-04-16

Clean Install with LiveUSB, OpenSolaris preview 2009.06, based on build snv_111

 GENUNIX から osol-0906-x86-111.usb をダウンロードして、usbcopy スクリプトを使って LiveUSB (IOdata 1GB miniSD + USB-Reader-Writer-adaptor) を作成した。(前稿参照
 この LiveUSB を用いて、My Notebook PC, Dell Latitude D410 にクリーンインストールを試みた。
 インストール済みの Opensolaris pre. 2009.06, build snv_109 を # pkg image-update してもよいのだが、
 snv_110 で遭遇した、トラブル(バグ?)を回避できるか?・・・期待を込めて、敢えてクリーン・インストールしてみる。
 Windoz XP, OpenSolaris pre.2009.06, Ubuntu 9.04 beta から成る、トリプル・ブートシステムだ。
 OpenSolaris をインストールすると、Grub Boot Menu (menu.lst) が書き換えられてしまうので、
 インストール後に menu.lst を編集して、Ubuntu の起動メニューを追記することにする。


 環境: Dell Latitude D410, Intel Pentium-M1.6GHz, RAM 2048MB (533Mhz)
         Graphics Video Chipset: intel 915GM (128MB Shared memory).
         Windoz XP NTFS : /dev/sda1, /dev/sda2, Total 60GB (Primary)
         Solaris Partition : /dev/sda3 40GB (Primary)
         Linux Partition : /dev/sda4 60GB (Extended, Logical)
         Ubuntu (Ext3) : /dev/sda5, /dev/sda6, /dev/sda7(swap), /dev/sda8


 USB Pen Drive を USBポートに装着してPC電源投入。 POST の後、"F12" キー押下、
 起動メニューを表示。 USB ドライブを選択して LiveUSB を起動させる。
 操作は LiveCD と同様。スタートアップメニューのトップライン(先頭行)を選択してブート完了。
 途中で、Language と KeyBoard Layout の問いかけがある。 Japanese を選択。
 以後、すんなりとオートログインして、GNOME Desktop 画面が立ち上がった。


  Image-01 LiveUSB(CD)スタートアップ後の GNOME Desktop 画面
 
 DDU(Device Driver Utility) を起動して、My Notebook デバイスの認識状況をチェックする。
 例によって、Modem Driver と Smart Card Driver は認識されない。

Image-02 DDU(Device Driver Utility) 検出結果表示画面

 Firefox は 3.1 beta3 になっている。 snv_111 ではチャンと動きますかな?
 さて、クリーン・インストールしてみよう。 デスクトップのインストールアイコンをクリックしてインストール開始。
 Solaris Partition は 40GB を割り当てた。 約 20 分でインストールが完了した。 即、システムを再起動。
 インストール直後の初動 GRUB メニュー画面は、 osol-0906-snv_111(Graphic console) と Windows のみ表示される。
 後で Grub menu.lst を編集して、ubuntu 9.04 beta 起動メニューの追加と opensolaris と windoz 起動メニューの体裁を整えることにする。

 特に問題なくシステムが立ち上がり、GDM ログイン画面が表示される。
 予め設定しておいた ユーザ名とパスワードを入力して、 GNOME Desktop にログインする。
 
Image-03 OpenSolaris build snv_111 GDM ログイン画面

Desktop のデフォルトの背景は 2008.11 と比べてちょっとクールかも。
  
Image-04 OpenSolaris snv_111 初動 GNOME Desktop 画面

 インストール後のシステムの設定とアプリケーション・開発ツールの導入については後述。


2009-04-15

Makeup LiveUSB with OpenSolaris preview 2009.06, build snv_111

Tue Apr 07 2009 OpenSolaris preview 2009.06, based on build 111, is available!
Several iso images and usb images are able to download from GENUNIX site.
1. Download osol-0906-111-x86.usb
  $ mkdir ~/DVD_CD-Image
  $ mkdir ~/DVD_CD-Image/osol-0906-b111
  $ cd ~/DVD_CD-Image/osol-0906-b111
  $ wget http://www.genunix.org/distributions/indiana/osol-0906-111-x86.usb
  $ wget http://www.genunix.org/distributions/indiana/md5sums_111.txt
  $ ls
  md5sums_111.txt osol-0906-111-x86.usb
2. Checksum the downloaded file.
 $ md5sum osol-0906-111-x86.usb
  d6548ae861d23f1f4e984b56b2911892 osol-0906-111-x86.usb  : checksum okey!
3. Copy osol-0906-111-x86.usb file to my pkging drectory.
 $ cp -p osol-0906-111-x86.usb ~/src-pkg/
4. Download distro_constructor.
  $ cd src-pkg
 $ hg clone ssh://anon@hg.opensolaris.org/hg/caiman/distro_constructor
 The authenticity of host 'hg.opensolaris.org (72.5.123.5)' can't be established.
 RSA key fingerprint is 63:b9:7a:f3:dc:a4:47:a7:a5:50:ef:05:78:39:8d:ad.
 Are you sure you want to continue connecting (yes/no)? yes
 remote: Warning: Permanently added 'hg.opensolaris.org,72.5.123.5' (RSA) to the list of known hosts.
 destination directory: distro_constructor
 requesting all changes
 adding changesets
 adding manifests
 adding file changes
 added 107 changesets with 575 changes to 415 files
 updating working directory
 45 files updated, 0 files merged, 0 files removed, 0 files unresolved
5. Comfirm the downloaded distro_constructor
 $ ls
 distro_constructor osol-0906-111-x86.usb
 $ cd distro_constructor
 $ ls
 README new packages src test_data tools usr
 $ cd tools
 $ ls
 listusb proc_slist.pl proc_tracedata usbcopy usbgen
 $ ls ../../
 distro_constructor osol-0906-111-x86.usb
6. Insert a USB Pen Dive ( > 1GB) to one of USB ports.
  $ export LANG=C
7. Makeup LiveUSB image file to the USB Pen Drive.
  Execute usbcopy script.
  $ pfexec ./usbcopy ../../osol-0906-111-x86.usb
  Found the following USB devices:
  0: /dev/rdsk/c7t0d0p0 SAMSUNG CDRW/DVD SN-324S U306
  1: /dev/rdsk/c9t0d0p0 952.5 MB USB Storage Device
  Enter the number of your choice: 1

  WARNING: All data on your USB storage will be lost.
  Are you sure you want to install to
  USB Storage Device, 952 MB at /dev/rdsk/c9t0d0p0 ? (y/n) y
  Copying and verifying image to USB device
  Finished 786 MB in 420 seconds (1.8MB/s)
  0 block(s) re-written due to verification failure
  Installing grub to USB device /dev/rdsk/c9t0d0s0
  Completed copy to USB

 $ cd ~
 $ pfexec reboot
8. Startup from the LiveUSB, then Select the BIOS boot menu: start from USB Storage.
________________________________
* Environment: 

    Dell Latitude D410, Pentium-M1.6, 2048MB (533MHz), 40GB/160GB HDD.
    Triple Boot System: Osol-0906-b109, Windoz XP, Ubuntu 9.04 beta.
________________________________

2009-04-06

OpenSolaris preview 2009.06, based on build 110 is now available.

OpenSolaris preview 2009.06 Rlease, Build snv_110
kernel snv_109 からコマンドラインで # pkg image-update して snv_110にアップデートしたとき、
デスクトップログイン後にアプリケーションを起動すると、例外なく画面がフリーズして、数秒後に自動的にシステムダウンし、再起動してしまう。 これでは実用に耐えないので、以前の BE (snv_109) で運用中だ。

GENUNIX サイトで OpenSolaris preview 2009.06 snv_b110 が入手できる。
ここからは、すべてのビルドを閲覧し、ダウンロードできる。
ISO Universal x86 / osol-0906-110-x86.iso をダウンロードして、My NoteBook PC に クリーン
インストールしてみる。 Live CD を起動して、インストール作業は問題なく完了した。

環境: Dell Latitude D410, Intel Pentium-M1.6GHz, RAM 2048MB (533Mhz)
Windoz XP NTFS : /dev/sda1, /dev/sda2, Total 60GB (Primary)
Solaris Partition : /dev/sda3 40GB (Primary)
Linux Partition : /dev/sda4 60GB (Extended, Logical)
Ubuntu (Ext3) : /dev/sda5, /dev/sda6, /dev/sda7, /dev/sda8

$ uname -a
SunOS xxxxxx 5.11 snv_110 i86pc i386 i86pc Solaris

$ more /etc/release
OpenSolaris 2009.06 snv_110 X86
Copyright 2009 Sun Microsystems, Inc. All Rights Reserved.
Use is subject to license terms.
Assembled 19 March 2009

Repository (http://pkg.opensolaris.org/dev) を追加して、これを有効(preferred) にする。
$ pfexec pkg set-authority -P -O http://pkg.opensolaris.org:80/dev/ osol.develop
$ pfexec pkg authority
PUBLISHER   TYPE   STATUS   URI
osol.develop (preferred) origin online http://pkg.opensolaris.org:80/dev/
opensolaris.org origin online http://pkg.opensolaris.org:80/release/

インストール完了後にシステムを再起動して、GDM ログインは問題なくできた。
しかし、GNOME Desktop 上で Panel メニューやアイコンをマウスでクリックする度に、フリーズしてしまい、 数秒後にシステムが勝手にシャットダウン、再起動してしまう。 snv_b110 は MyNoteBook D410 では実用に耐えない。 回避策はあるのかな?

2009-01-06

Replace to Dell Lattitude D410 notebook computer

 レガシーノートPC DynaBook Satellite 1800 の LCDパネル/上部筐体をつないでいるヒンジ がついに壊れてしまった。 後学のために、このマシンを分解してみる。・・・後記。
ヤフオクで中古モバイルノートをサーベイして、Dell Lattitude D410 を速攻ゲットした。
ハードウェアスペック
PentiumM 1.6GHz/メモリ512MB/ハードディスク40GB/12.1”TFT/GibaLAN/ワイヤレスLAN内蔵。
WindowsXP インストール済み。OSのリカバリCDが付属。
外部モニタ設置可能なポートリプリ ケータが付属。
付属品: WindowsXP Home+Service Pack2の再インストールCD(DELL正規品)、
ドライバCD(バックアップ品)、アプリケーションCD(RecordNow、PowerDVD
バックアップ品)、外付けUSBドライブベイ、CD-RW&DVD-ROMコンボドライブ
モジュール(着脱式)、フロッピードライブモジュール (着脱式)、USBマウス、
ポートリプリケータキット、AC電源アダプタ(大小2個)、電源コード、
バッテリパック(本体装着済み)。 とても激安にて入手できて余は満足じゃ。
 本機は2005年2月発売の B5サイズ ビジネスノートPCだ。昨今の ULPC よりも操作性で優位か?

コンポーネントパーツのアップグレード・換装;
サービスマニュアルを参照して、ついでにPC内部をクリーニング、CPUファン・ヒートシンクを清掃する。
1.メモリ フル実装: A-Data SODIMM DDR2-PC4200(533MHz) 1GB × 2 = 2 GB
2.ハードドライブ換装: Seagate ST9160821A UTA-100 160GB (バルク品)
3.Dell Latitude D410 用 Li-ion バッテリー(互換品)に新品交換。
1〜3 の調達コストは合わせて約18K円也。DDR2メモリ価格が大幅下落していて大助かりだ。
後日CPUをM760(2GHz)に換装してみやう。
4.BIOSをアップデートしておく。 Delll Japan サイトからドライバ・その他をダウンロードする。
5.OS クリーンインストール: Windows XP professional +SP2, OpenSolaris 2008.11, ubuntu 8.10 Intripid -ja-desktop (日本語 Remix CD) の triple-boot-system を構築する。

2008-08-03

Wine de Jw_cad on OpenSolaris2008.05 release 改訂


JW_Cad を OpenSolaris 2008.05 release on My Notebook Computer にインストールしてみた.このときの、インストール・雑感のメモ.


.Wine binary pkg for solaris のダウンロード
  安直ながら、瀧さんのブログサイトからいただくことにする。source ファイルを WineHQ からダウンロードして、コンパイル・インストールする手もある。
$ pfexec wget http://kohju.justplayer.com/docs/solarispkg/JPCwine-0.9.54J02.pkg.bz2
$ pfexec bzip2 -d JPCwine-0.9.54J02.pkg.bz2
$ pkgadd -d ./JPCwine-0.9.54J02.pkg

パッケージは /opt/JPC 以下にインストールされる.
$HOME/.bashrc の export PATH= 行に /opt/JPC/bin を追加しておく.

2.初期設定: GNOME端末を起動して、
   $ winecfg
hogeuser の ホームディレクトリに $HOME/.wine が生成されて、wine設定画面が表示される.
 
 Image-01 Wine設定画面

2−1.日本語入力の設定:
Wineの標準設定では、日本語表示はできても日本語入力ができない.  
$ wine regedit.exe

HKEY_CURRENT_USER → Software → Wine で新規キーを設定。
[ 新しいキー #1]を[X11 Driver] に変更する.

$ vi ~/.wine/user.reg
[Software\\Wine\\X11 Driver] xxxxxxxxx という行の下に "InputStyle"="root" を追加する.
 
Image-02 レジストリ編集画面
Oensolaris 2008.05 の hogehost の $HOME directory の ~/.fonts 以下に、いくつかの日本語 TTF フォントを置いてある. この ~/.fonts ディレクトリのリンクを ~/.wine/drive_c/windows/fonts/ 以下に置いておく.
安直な方法だが、とりあえず wine のアプリケーションから ユーザーフォントの設定が可能となるはずだ.

システムの再起動
$ pfexec reboot  ※システムを再起動して、変更した設定を反映させる.

2−2.Windowsインストーラの文字化け対策:Font の置換
$ vi ~/.wine/system.reg

つぎの項目の最後に一行追加する.
[Software\\Microsoft\\Windows NT\\CurrentVersion\\FontSubstitutes] "MS Sans Serif"="MS UI Gothic

システムの再起動   
$ pfexec reboot    ※システムを再起動して、変更した設定を反映させる.

3. Windows アプリケーションの起動
3−1. NotePad :  Windows に付属する簡易エディタである.
 $HOME/.wine/drive_c/windows/ 配下にある.
 GNOME端末を起動して、$ wine notepad.exe   して起動させる. 適切なフォントを選択すれば、日本語表示と日本語入力ができるはずである.

フォントの設定で、ここでは さざなみゴシック を選択した.
半/全 変換キーで日本語入力 (SCIM/Anthy) の切替えができる. (Image-03) 
このときの GNOME端末の表示は (Image-04) のようになったが、よくわからない.
NotePad を操作する度にメッセージを吐き出す.


Image-03 NotePad 起動・フォント設定画面
 
Image-04. GNOME端末 NotePad 起動・操作時の表示メッセージ

3−2. Jw_cad について
Jwcad-Wikipedia より抜粋・引用
Jw_cad は Windows 95,98,Me/NT,2000,XP,Vista 上で動作する 2次元汎用CAD フリーソフトである.DOS版とWindows版がある. Windows版は DOS版の軽快な操作性を継承し、時計の文字盤を模した操作メニュー「クロックメニュー」を実装. この他にも図面データの倍精度実数化、面図形、天空図作成など多くの機能が付加された. Jiro Shimizu氏、Yoshifumi Tanaka氏が開発.
名称はバージョン3.51Cまでは「Jw_cad for Windows」、バージョン4.00以降は「Jw_cad」と称する. DOS版と区別するため、ユーザー間では「JWW」「Jw_win」「Windows版」などの呼称がとられる.
最新版は Ver.6.01(2008年01月03日リリース)で、 現在はSXF Lv2への対応に向け力を入れている. また、Ver.6.01 で、3次元DXFデータ出力の機能が追加されたため、Google SketchUp との連携ができるようになった. Windows版で扱える図面ファイル形式は JWC、JWW、DXF、SXF、P21 で JWW が基本形式. 仕様はWebサイトで公開されている.複数のバージョンが存在し、新しいバージョンのファイルを古いバージョンで読み込むことはできない.この場合特にエ ラーメッセージは表示されないため注意が必要である. なお、この CADには【外部変形】というユニークな拡張機能があって、さまざまな付加機能が得られる.その主なタイプを3点に絞ってまとめて見ると…、
1.画面上に迅速に作図するタイプ  → (例)木造平面図の描画
2.画面上のデータを集計するタイプ → (例)木造筋違の自動描画
3.画面とは関係なく裏で自動計算  → (例)鉄骨二次部材などの断面算定
商用CAD ソフトウェアの愛好家とは別に、Jw_cad のもつ軽快な操作性から建築・設備設計分野で実用に供され、依然としてその人気は根強い.フリーソフトであることもあって、インターネット上のコミュニ ティや発行されている参考書籍も多数存在あるので、中小設計企業などは導入しやすいのも人気のひとつかもしれない.

ダウンロードとインストールJw_cad のページ ダウンロードコーナーから最新バージョン ver6.01 (jww601.exe) をダウンロード・インストールする.

GNOME端末を起動して、つぎのコマンドを与える.ダウンロードファイルの格納ディレクトリは ~/src-pkg である.
$ cd ~/src-pkg
$ wget http://www.jwcad.net/download/jww601.exe
$ wine jww601.exe

デフォルトでは C:\jww にインストールされる. スタートメニューにはインストールしない.

Jw_cad の起動:
GNOME端末を開いて、つぎのコマンドを与えて、Jw_cad を起動する.
$ wine 'c:\jww\Jw_win.exe'

とりあえず Jw_cad は起動し、初期起動画面が表示されるが、GNOME端末上で次のようないくつかのエラーメッセージを吐き出す.
ここで MFC42.DLL が必要だよ・・・と叱られる.(加えて、MSVCRT.DLL が必要だよと叱られる場合もある.)
$ wine "c:\jww\Jw_win.exe"
---------------------------------------------------------------------
err:iphlpapi:getNumWithOneHeader Unable to open '/proc/net/route' to count entries!
err:iphlpapi:getRouteTable unimplemented!
err:module:import_dll Library MFC42.DLL (which is needed by L"C:\\jww\\common_lib.dll") not found
err:module:import_dll Library MFC42.DLL (which is needed by L"C:\\jww\\common_lib_AP202.dll") not found
err:toolbar:TOOLBAR_GetImageListForDrawing bitmap for ID 0, index 0 is not valid, number of bitmaps in imagelist: 0
fixme:imm:ImmGetOpenStatus (7fcddd50): semi-stub
fixme:imm:ImmReleaseContext (2010a, 7fcddd50): stub
fixme:imm:ImmGetOpenStatus (7fcddd50): semi-stub
err:toolbar:TOOLBAR_GetImageListForDrawing bitmap for ID 0, index 0 is not valid, number of bitmaps in imagelist: 0
--------------------------------------------------------------------------
いったん、Jw_cad を終了する.
WindowsXP の C:\windows\system32 以下にある mfc40.dll と msvcrt.dll を ~[$hogehome]/.wine/drive_c/windows/system32/ にコピーする。
あるいは、ここら辺か らサーヴェイしてゲットしてもよいかも.

再度、Jw_cad を起動する. 
先の叱られたメッセージは出なくなった.ツールバーに関連したエラーメッセージ?が吐き出される.
以後、起動した画面を操作する度に続々とメッセージを端末に吐き出す.(それらのもつ意味はあるのだろうが・・・よくわからない.)
起動画面は (Image-05).ここでも、端末は意味不明なメッセージを吐き出す.
Windows 側で作成した設定ファイルや図形・外部変形データをここにコピーすれば、Windows と同様に扱える.
ただし、日本語名のファイルは文字エンコードの関係で文字化けする場合もある.これは予め半角英数表記することで回避することができる.
環境設定やオプション設定は特に問題なく Windows と同様の操作ができた.

Jw_cad の操作詳細については省略.
(参考:Jw_cad 関連参考書JWW情報館=JWCAD関連のポータルサイト)


Image-05: Jw_cad 初期起動画面 
※ 設定ファイル ( *.jwf) はカスタマイズしてある. 
図面(*.jww ファイル)の読み込み:(Image-06) 
Windows 上で作成済みの適当な図面を選んで読み込ませてみる.表示にクズレ、文字化けや文字配置のずれもなく動作状態は良好である. ここでも端末は多量のメッセージ (エラーを含む)を吐き出す.
文字入力、文字編集ともにできたが、文字入力・編集をくりかえすと、ときどき画面がフリーズしてハングアップする.


Image-06 作成済みの図面の読込み後の表示画面
( ※ 操作メニューの配置は適宜変えている )
ソフトの起動〜表示するまでの時間が WindowsXP ベースと比べてはるかに遅いものの、いったん立ち上がれば操作性に遅滞もなく、OpenSolaris 2008.05 上で Jw_cad が動くことはわかった.
Wine の最新バージョンではどうなるのか、後日試してみよう.

※ Jw_cad 起動〜諸操作〜終了までの端末のメッセージ表示
---------------------------------------------------------
$ wine 'c:\jww\Jw_win.exe'
err:toolbar:TOOLBAR_GetImageListForDrawing bitmap for ID 0, index 0 is not valid, number of bitmaps in imagelist: 0
err:toolbar:TOOLBAR_GetImageListForDrawing bitmap for ID 0, index 0 is not valid, number of bitmaps in imagelist: 0 fixme:imm:ImmGetOpenStatus (7fcddb78): semi-stub fixme:imm:ImmReleaseContext (20108, 7fcddb78): stub
fixme:imm:ImmGetOpenStatus (7fcddb78): semi-stub
err:toolbar:TOOLBAR_GetImageListForDrawing bitmap for ID 0, index 0 is not valid, number of bitmaps in imagelist: 0
wine: Unhandled page fault on read access to 0x0000001c at address 4825e3 (thread 0009), starting debugger...
Unhandled exception: page fault on read access to 0x0000001c in 32-bit code (0x004825e3). Register dump: CS:016b SS:0173 DS:0173 ES:0173 FS:1007 GS:01c3 EIP:004825e3 ESP:7fa0fcb4 EBP:006e6840 EFLAGS:00010246( - 00 -RIZP1) EAX:00000000 EBX:00000000 ECX:7d001ec0 EDX:006af61c ESI:006e6810 EDI:00000001
Stack dump: 0x7fa0fcb4: 00000111 00000086 00000000 00000001 0x7fa0fcc4: 006e6810 00000000 00656b67 00000000 0x7fa0fcd4: ffffffff 006e6810 7fa0fd98 7fc53bec 0x7fa0fce4: 00000001 0065871c 006e6810 006598af 0x7fa0fcf4: 0063b1a0 7fcd1441 0064fb3c 00400000 0x7fa0fd04: 00000000 7fcd1441 0000000a 0063b2f2 0200: sel=1007 base=7fec0000 limit=00003fff 32-bit rw- Backtrace: =>1 0x004825e3 in jw_win (+0x825e3) (0x006e6840) 2 0x000000a1 (0x0001002a) 3 0x00000000 (0x00000000) 0x004825e3: movl 0x1c(%eax),%ecx
Modules: Module Address Debug info Name (21 modules) PE 400000- 727000 Export jw_win PE 10000000-10055000
Deferred common_lib PE 5f400000-5f4f2000
Deferred mfc42 PE 7d4e0000-7d5bb000
Deferred common_lib_ap202 PE 7d640000-7d644000
Deferred msvcrt PE 7ef80000-7ef84000
Deferred oleaut32 PE 7f090000-7f094000
Deferred rpcrt4 PE 7f140000-7f144000
Deferred ole32 PE 7f190000-7f1a1000
Deferred oledlg PE 7f1e0000-7f1e6000
Deferred winspool PE 7f250000-7f256000
Deferred shlwapi PE 7f2f0000-7f36b000
Deferred shell32 PE 7f3d0000-7f43a000
Deferred comdlg32 PE 7f510000-7f522000
Deferred comctl32 PE 7f5a0000-7f5a4000
Deferred version PE 7f5f0000-7f5f4000
Deferred advapi32 PE 7f680000-7f684000
Deferred gdi32 PE 7f780000-7f795000
Deferred user32 PE 7f840000-7f88d000
Deferred winmm PE 7fc30000-7fc9f000
Deferred kernel32 PE 7ff90000-7ff94000
Deferred ntdll Threads: process tid prio (all id:s are in hex) 00000008 (D) C:\jww\Jw_win.exe 00000009 0 <== 0000000a 0000000b 0 0000000c 0000000f 0 0000000e 0 0000000d 0 Backtrace: =>1 0x004825e3 in jw_win (+0x825e3) (0x006e6840) 2 0x000000a1 (0x0001002a) 3 0x00000000 (0x00000000)
----------------------------------------------------

※ 初稿 2008-July-31 23:10
    加筆・修正/ 改稿・改訂 2008-Aug.-03, by Baian.
2008-07-13

Triple Boot Grub Howto : added the OpenSolaris 2008.05 on My Toshiba Satelle 1800 notebook computer

Note : The OpenSolaris installer overwrites existing MBR with GRUB, it's impossible to have it install GRUB only the root partition. Keep this in mind especially if you have Linux installed, you will need to manually add the Linux boot title line to the OpenSolaris GRUB Menu (/rpool/boot/grub/menu.lst) after the OpenSolaris have been installed.
注記:OpenSolaris のインストーラは GRUB とともに 既存の MBR を root パーティションに上書きする。
それで、特に注意しなければならないのは、Linux が既にインストールされていた場合には、OpenSolaris のインストール後に OpenSolris の GRUB (menu.lst) を編集して Linux の ブートリストを追加する必要がある。

OpenSolaris をインストールする前(Windoz XP Professioal +SP3 と Xubuntu 8.04 Hardy heron との Dualboot System)の GRUB(/boot/grub/menu.lst) を Pendrive (USB Flash memory) やフロッピーディスクに書き出しておく。
また、この GRUB(menu.lst) を次のコマンドを与えて、レスキュー・フロッピー・ディスクを作成しておく。
こうすることで、万が一 OpenSolaris の GRUB が破損してシステムが立ち上がらないときに、このフロッピーディスクを使ってシステムを起動することができる。
以下の操作は、Xubuntu 8.04 (Hardy Heron) 上でおこなう。
$ sudo fdformat /dev/fd0 # フロッピーディスクのフォーマット
$ sudo mke2fs /dev/fd0 # ext2 ファイル作成
$ sudo grub-install --root-directory=/ /dev/fd0 #フロッピーディスクにGRUBを作成
# Xubuntu 8.04 における GRUB Menu (/boot/grub/menu.lst) は以下の通りである。
*******************************************************
# menu.lst - See: grub(8), info grub, update-grub(8)
# grub-install(8), grub-floppy(8),
# grub-md5-crypt, /usr/share/doc/grub
# and /usr/share/doc/grub-doc/.

## default num
# Set the default entry to the entry number NUM. Numbering starts from 0, and
# the entry number 0 is the default if the command is not used.
#
# You can specify 'saved' instead of a number. In this case, the default entry
# is the entry saved with the command 'savedefault'.
# WARNING: If you are using dmraid do not use 'savedefault' or your
# array will desync and will not let you boot your system.
default 0

## timeout
# Set a timeout, in SEC seconds, before automatically booting the default entry
# (normally the first entry defined).
timeout 12

#A splash image for the grub menu
splashimage=(hd0,4)/grub/splashimages/52420-sleekdragon.xpm.gz

title Ubuntu 8.04, kernel 2.6.24-18-generic
root (hd0,4)
kernel /vmlinuz-2.6.24-18-generic root=/dev/hda6 ro vga=791
initrd /initrd.img-2.6.24-18-generic

title Ubuntu 8.04, kernel 2.6.24-18-generic(Rescue / Recovery mode)
root (hd0,4)
kernel /vmlinuz-2.6.24-18-generic root=/dev/hda6 ro single
initrd /initrd.img-2.6.24-18-generic

title Ubuntu 8.04, memtest86+
root (hd0,4)
kernel /memtest86+.bin
quiet

### END DEBIAN AUTOMAGIC KERNELS LIST

# This is a divider, added to separate the menu items below from the Debian
# ones.
title Other operating systems:
root

# This entry automatically added by the Debian installer for a non-linux OS
# on /dev/hda1
title Microsoft Windows XP Professional +SP3
root (hd0,0)
savedefault
makeactive
chainloader +1

# This entry for OpenSolaris 2008.05 release # 以下のエントリーを追記する。
# on /dev/hda3
title OpenSolaris 2008.05 GRUB Boot Menu
root (hd0,2)
savedefault
makeactive
chainloader +1
************************************************
# OpenSolaris 2008.05 の GRUB Menu (/rpool/boot/grub/menu.lst) は次のとおり。
OpenSolaris 2008.05(11)、Xubuntu 8.04、および Windoz XP Professional から成る、
Triple Boot System である。
************************************************
## GRUB Menu (/rpool/boot/rub/menu.lst) scripts as the followings:
splashimage /boot/grub/splash.xpm.gz
timeout 12
default 0
#---------- ADDED BY BOOTADM - DO NOT EDIT -------
title OpenSolaris 2008.11 snv_91 X86
bootfs rpool/ROOT/opensolaris-1
kernel$ /platform/i86pc/kernel/$ISADIR/unix -B $ZFS-BOOTFS
module$ /platform/i86pc/$ISADIR/boot_archive
#---------------------END BOOTADM-----------------
#---------- ADDED BY BOOTADM - DO NOT EDIT -------
title OpenSolaris 2008.05 snv_86_rc3 X86
bootfs rpool/ROOT/opensolaris
kernel$ /platform/i86pc/kernel/$ISADIR/unix -B $ZFS-BOOTFS
module$ /platform/i86pc/$ISADIR/boot_archive
#---------------------END BOOTADM-----------------
title Windows XP Professional +SP3
rootnoverify (hd0,0)
chainloader +1

# Unknown partition of type 5 found on /dev/rdsk/c4d0p0 partition: 4
# It maps to the GRUB device: (hd0,3) .

title Xubuntu 8.04, kernel 2.6.24-18-generic
root (hd0,4)
kernel /vmlinuz-2.6.24-18-generic root=/dev/hda6 ro vga=791
initrd /initrd.img-2.6.24-18-generic

title Xubuntu 8.04, kernel 2.6.24-18-generic (recovery mode)
root (hd0,4)
kernel /vmlinuz-2.6.24-18-generic root=/dev/hda6 ro single
initrd /initrd.img-2.6.24-17-generic

title Xubuntu 8.04, memtest86+
root (hd0,4)
kernel /memtest86+.bin
quiet
************************************************

2008-07-06

Install Howto OpenSolaris 2008.05 release on My Legacy Notebook computer (Part-2)

前投稿のつづき
Image-01 インストール完了画面
インストールが終了したら、『リブート(R)』をクリックしてシステムを再起動する.
これでインストールが完了する.再起動にあたり、システムCDを取り出しておく.
インストール完了後にはじめて再起動するにあたって、初回ブート時のみ以下の手順でシステムを起動させる.
X-windowが正常に起動するのを確認したのちに、グラフィカルログインを成功させるための、オマジナイ的な手順を踏むわけだ.
1.GRUB メニューのトップライン(先頭行)を選択する.kernel ・・・記述行を編集する.
キーボードの "E" キーを押して、行末に " -m milestone=single-user " と追加する.
Enter キーを押して編集内容を確定させる.
---------------------------------------------
bootfs rpool/ROOT/opensolaris
kernel$ /platform/i86pc/kernel/$ISADIR/unix -B $ZFS-BOOTFS -m milestone=single-user ←--- 改行せず、一行で記述する.
module$/platform/i86pc/$ISADIR/boot_archive
---------------------------------------------
2."B” キーを押してシステムをブート(起動)させる. まずは、single-user でブート開始する.
3.ターミナル画面のままで、root password の入力を促すコマンドプロンプトが表示される.
# Input password for system maintenance ( Controled to bypass ) :
4.インストール時に設定した root password をキーボードから入力して、"Enter" で single-user でログインする.
5.インストール時に設定しておいた /etc/X11/xorg.conf ファイルのスクリプトを再確認する.
書換えられていないはずだ.
※ つぎのコマンドを入力する.
# ls /etc/X11/xorg.conf
# cat /etc/X11/xorg.conf
※ xorg.conf script (X.Org X Window System server configuration file)
-----------  抜粋  ----------------------
Section "Device"
Identifier "Trident Microsystems CyberBlade/i1"
Driver "trident"
Option "NoDDC"
EndSection
-----------  抜粋  ----------------------
6.いよいよグラフィカルログインさせる. 次のコマンドを入力する.
   # svcadm milestone all    ;--- ZFS , start X ----
7.GDM ( Gnome Display Manger ) が起動して、GDM ログイン画面が表示される
8.username と user passwd を入力して、”Enter" GNOME セッションがスタートする.
9.Gnome Splash Screen が表示されたのちに、GNOME Desktop Window 画面が表示される.
Image-02 Gnome Desktop 画面
 
Image-02 は パネルの上下を入替え、デスクトップにリンクフォルダを配した. また、デスクトップの外観の設定を一部変更したのでデフォルトの設定(見た目)とは多少違っている.
10. My Dynabook で opensolaris 2008.05 release がとりあえず 動いたゾ っと.

◇ インストール後に多少の違和感とともに気になったこと
1.GDM のメニュー画面から root としてログインできない.
参考: RBAC について Login and Root Specifications (Getting Started With OpenSolaris 2008.05)


2.インストール時に設定した login user (hogehoge) の 所属グループが staff になっている.
ubuntu 8.04 とも関連するので、user hogehoge(uid=1000 ) は group hogehoge (gid=1000 )に属させたい.
#grouppadd -g 1000 hogehoge
# usermod -u 1000 -g 1000 -d /export/home/hogehoge -m -s /bin/bash hogehoge
としたいのだが、このままでは user, group ともに変更できない. role を変更して root でログイン可能にさせた後に、変更ができるか試してみる.
あるいは、user を設定せずに root のみ設定して、システムを再インストールするか?

3.デーモンnwam によってネットワークの管理がなされている?
はじめてデスクトップにログインした状態では、ネットワーク接続ができない.
ethernet デバイス iprb0 はインストールの際に自動認識されたので、DHCPで自動設定されているものと思っていたのだが、WEbブラウザを立ち上げても外部のサイトにアクセスできなかった.
自前 ping ok 外部 ping failure
参考:nwam デーモンについて; OpenSolaris 2008.05入門(OpenSolaris OS へようこそ)  
nwam デーモンの状態をチェックしてみる.
hogehoge@hostname:~$ pfexec svcs -v nwam
STATE NSTATE STIME  CTID  FMRI
online  -    19:43:17 83  svc:/network/physical:nwam
hogehoge@hostname:~$ pfexec svcs -v svc:/network/physical
STATE NSTATE STIME CTID FMRI
disabled - 19:37:30 - svc:/network/physical:default
online - 19:43:17 83 svc:/network/physical:nwam
※ hogehoge@hostname:~$ pfexec restart svc:/network/physical:nwam
して、 iprb0 がアップして、ネットワークが有効になり、インターネット接続ができた.
下図参照:Image-03、Image-04
Image-03 nwam について
Image-04 Network brought up
4.USB2.0/1.1 (2-port) Cardbus 32bit/PC-Card アダプタを装着すると、画面がロックされシステムがフリーズしてしまう.強制的にパワースィッチを押して、電源を切断させる.
ここで、USB2.0/1.1 PC-Card アダプタは取り外しておく.
あらかじめ sddtool v.2.1 を起動して、サウンド・ドライバと ACPI ドライバがサポートされていないことは周知していた.
◇ opensolaris.org の project servay と google search によって、サウンド・ドライバ および Cardbus ドライバを入手して、インストールする.
参考:サウンド・ドライバ : OpenSoundSystem よりダウンロードする.
Latest release : http://www.4front-tech.com/release/oss-solaris-v4.0-1016-i386.pkg
Cadbus Device Diver : OpenSolaris.org_Laptop/Projects よりダウンロードする.
Latest driver : http://www.opensolaris.org/os/community/laptop/downloads/cardbus-0.3-bin.tar.gz
Driver のインストール後に、いったん システムを再起動させる
# pfexec reboot
再起動させて ログイン後に USB2.0/1.1 PC-Card をスロットに挿入する.
今度はハングアップせず、認識されたようだ.
適当な USB2.0 デバイスを接続してみると、自動認識された.
ファイルマネージャが起動して、デバイスファイルが閲覧できた.
# pfexec rmformat して確認する.
  
Image-05, Image-06 参照
Image-05 USBデバイスの認識
Image-06 rmformat コマンド出力結果
● オーディオ・サウンドは 音割れ・歪みが目立ち 聴くに耐えない.要調整だ.